Curriculum and Instruction
Unit Plan 2 - Visual Storytelling.
Enduring Understanding (Big Idea):
I can tell a story of my favorite character with a single image by learning how to draw said character, or characters, and using the elements of a story by planning things out with visual organization.
Essential Questions:
How can I plan the drawings of scenes from my favorite stories, cartoons, or shows, and describe what is happening using images? How can I draw my favorite characters, and communicate what is going on in a scene?
Rationale:
It is an important endured understanding because students’ work will be better received in the future if it tells a story. In addition, it helps with planning out ideas, so it serves as learning how to visually organize their thoughts. It also helps students learn, that if there is something they don’t understand, but want to, they can always independently research things. It is relevant to this age group because it allows my students to research how to draw their favorite characters and helps them practice drawing in the future when it’s easier to draw their favorite characters. It is important to explore it through art so that my students can have another platform for understanding, and comprehension, when it comes to stories, when just doing the reading in class can feel like too much. Also, because the MPS district currently wants all teachers, regardless of field, and/or specialty, to help teach kids how to read. This helps promote comprehension, and literacy. It also gives the students a chance to draw characters that they otherwise wouldn’t get a chance to with more mundane projects.
Lesson #1:
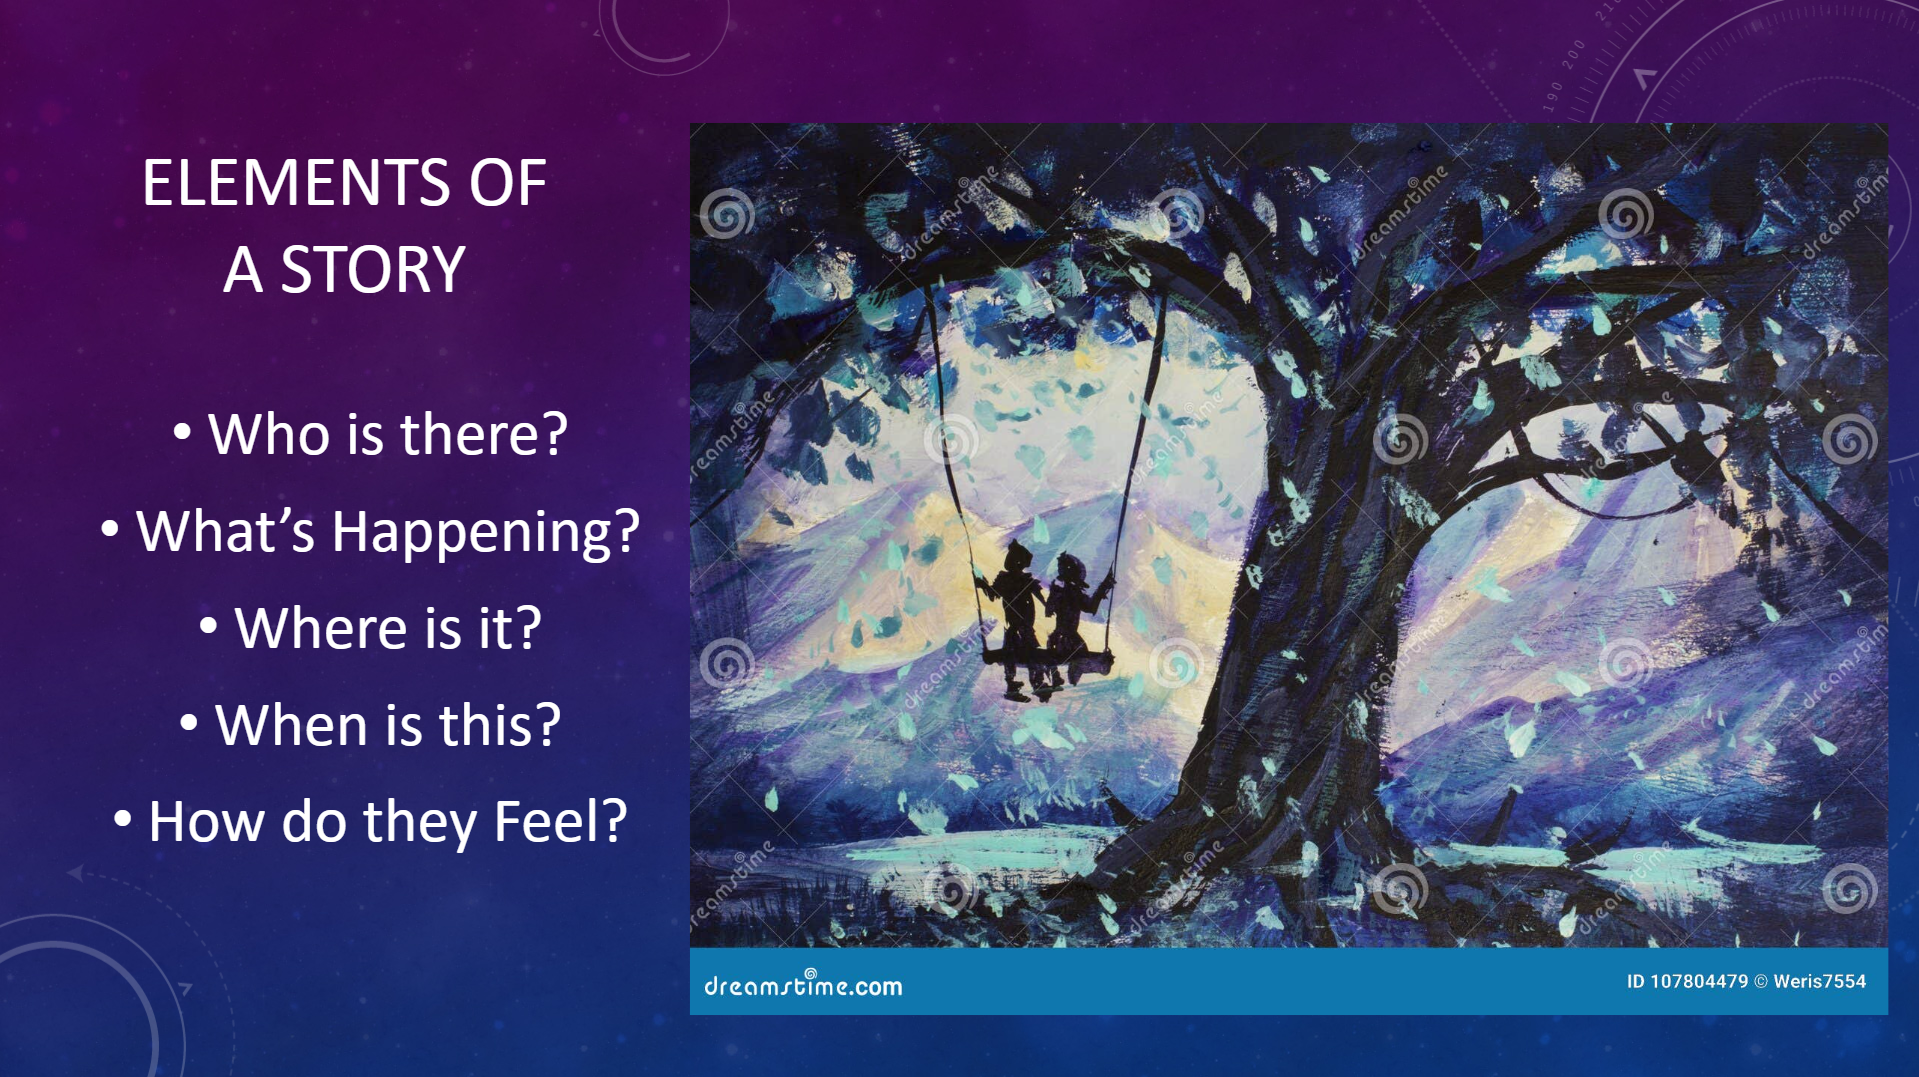
Elements of a Story
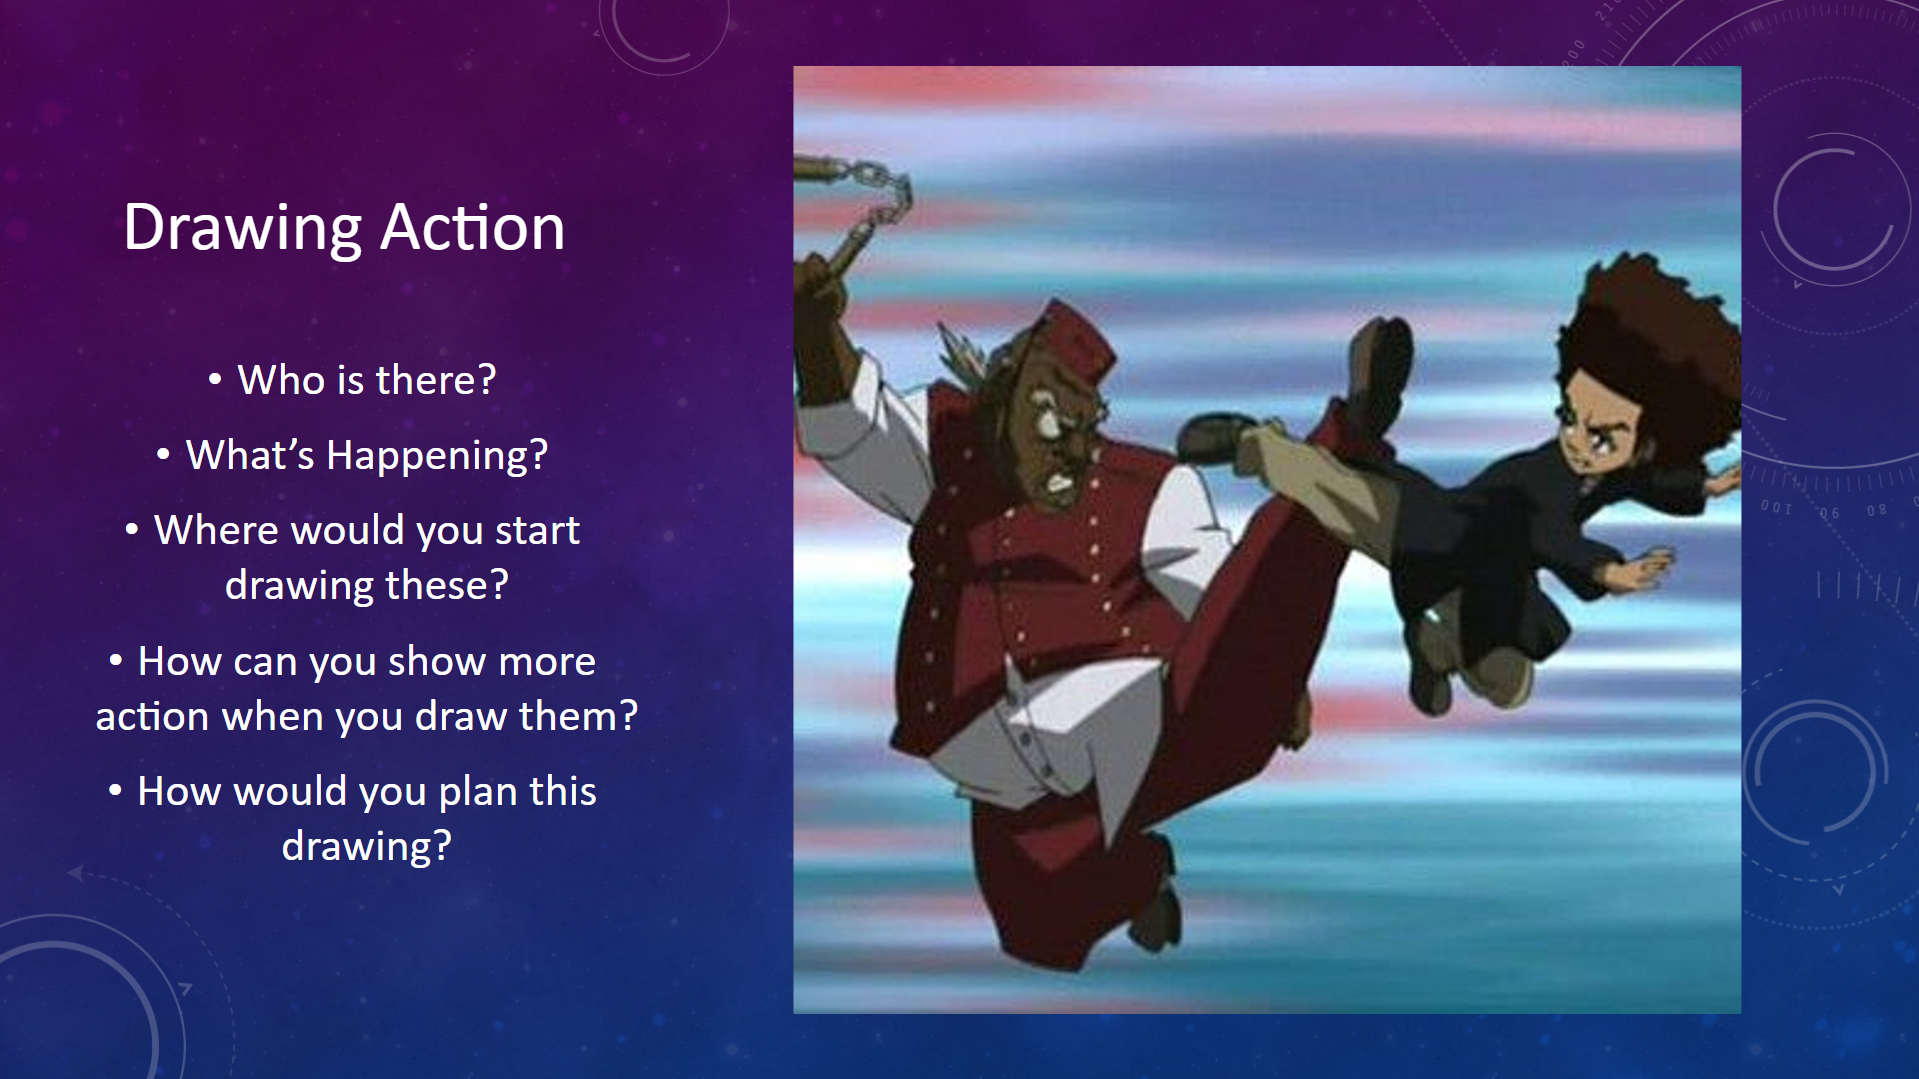
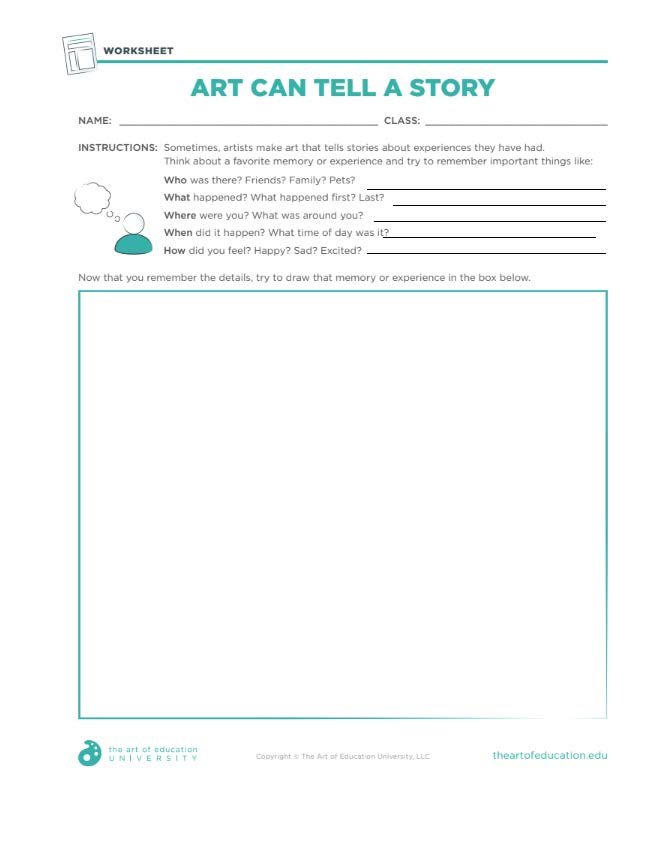
Students will go through a presentation including a VTS with a picture that a story can easily be attached to. In the VTS we will cover who is in it, where it takes place, what is happening in it, how the characters are feeling, and when it is. After some explaining, how the image tells a story, I will give the kids a worksheet that asks them to draw a memory, using the elements of a story.
Students will demonstrate their understanding, by finishing the worksheet drawing one of their favorite memories using the elements of a story.
Lesson #2:
Tape Resistance Painting (Setting, and time)
I will demonstrate painting using tape resistance, with the tape being used for trees or anything they don’t want to be painted with the background, elaborate that each image needs a horizon line drawn over the tape, and explain color bleeds, and the colors to use to show dawn (yellow, orange, red), and dusk (red, purple, blue), and doing bleeds with complimentary colors to make the ground, and explain that this will be the setting for their stories.
Students will demonstrate their understanding by painting a picture that has used tape to cover parts of the painting they don’t want certain colors on, so that they can be used after most of the painting is done and can show overlapping. This will also take care of the “Where”, and “When” aspects of the brainstorming so students may have an easier time with said brainstorm.
Lesson #3:
Organization, Research, and Collage (Who they are, how they are feeling, and what is happening)
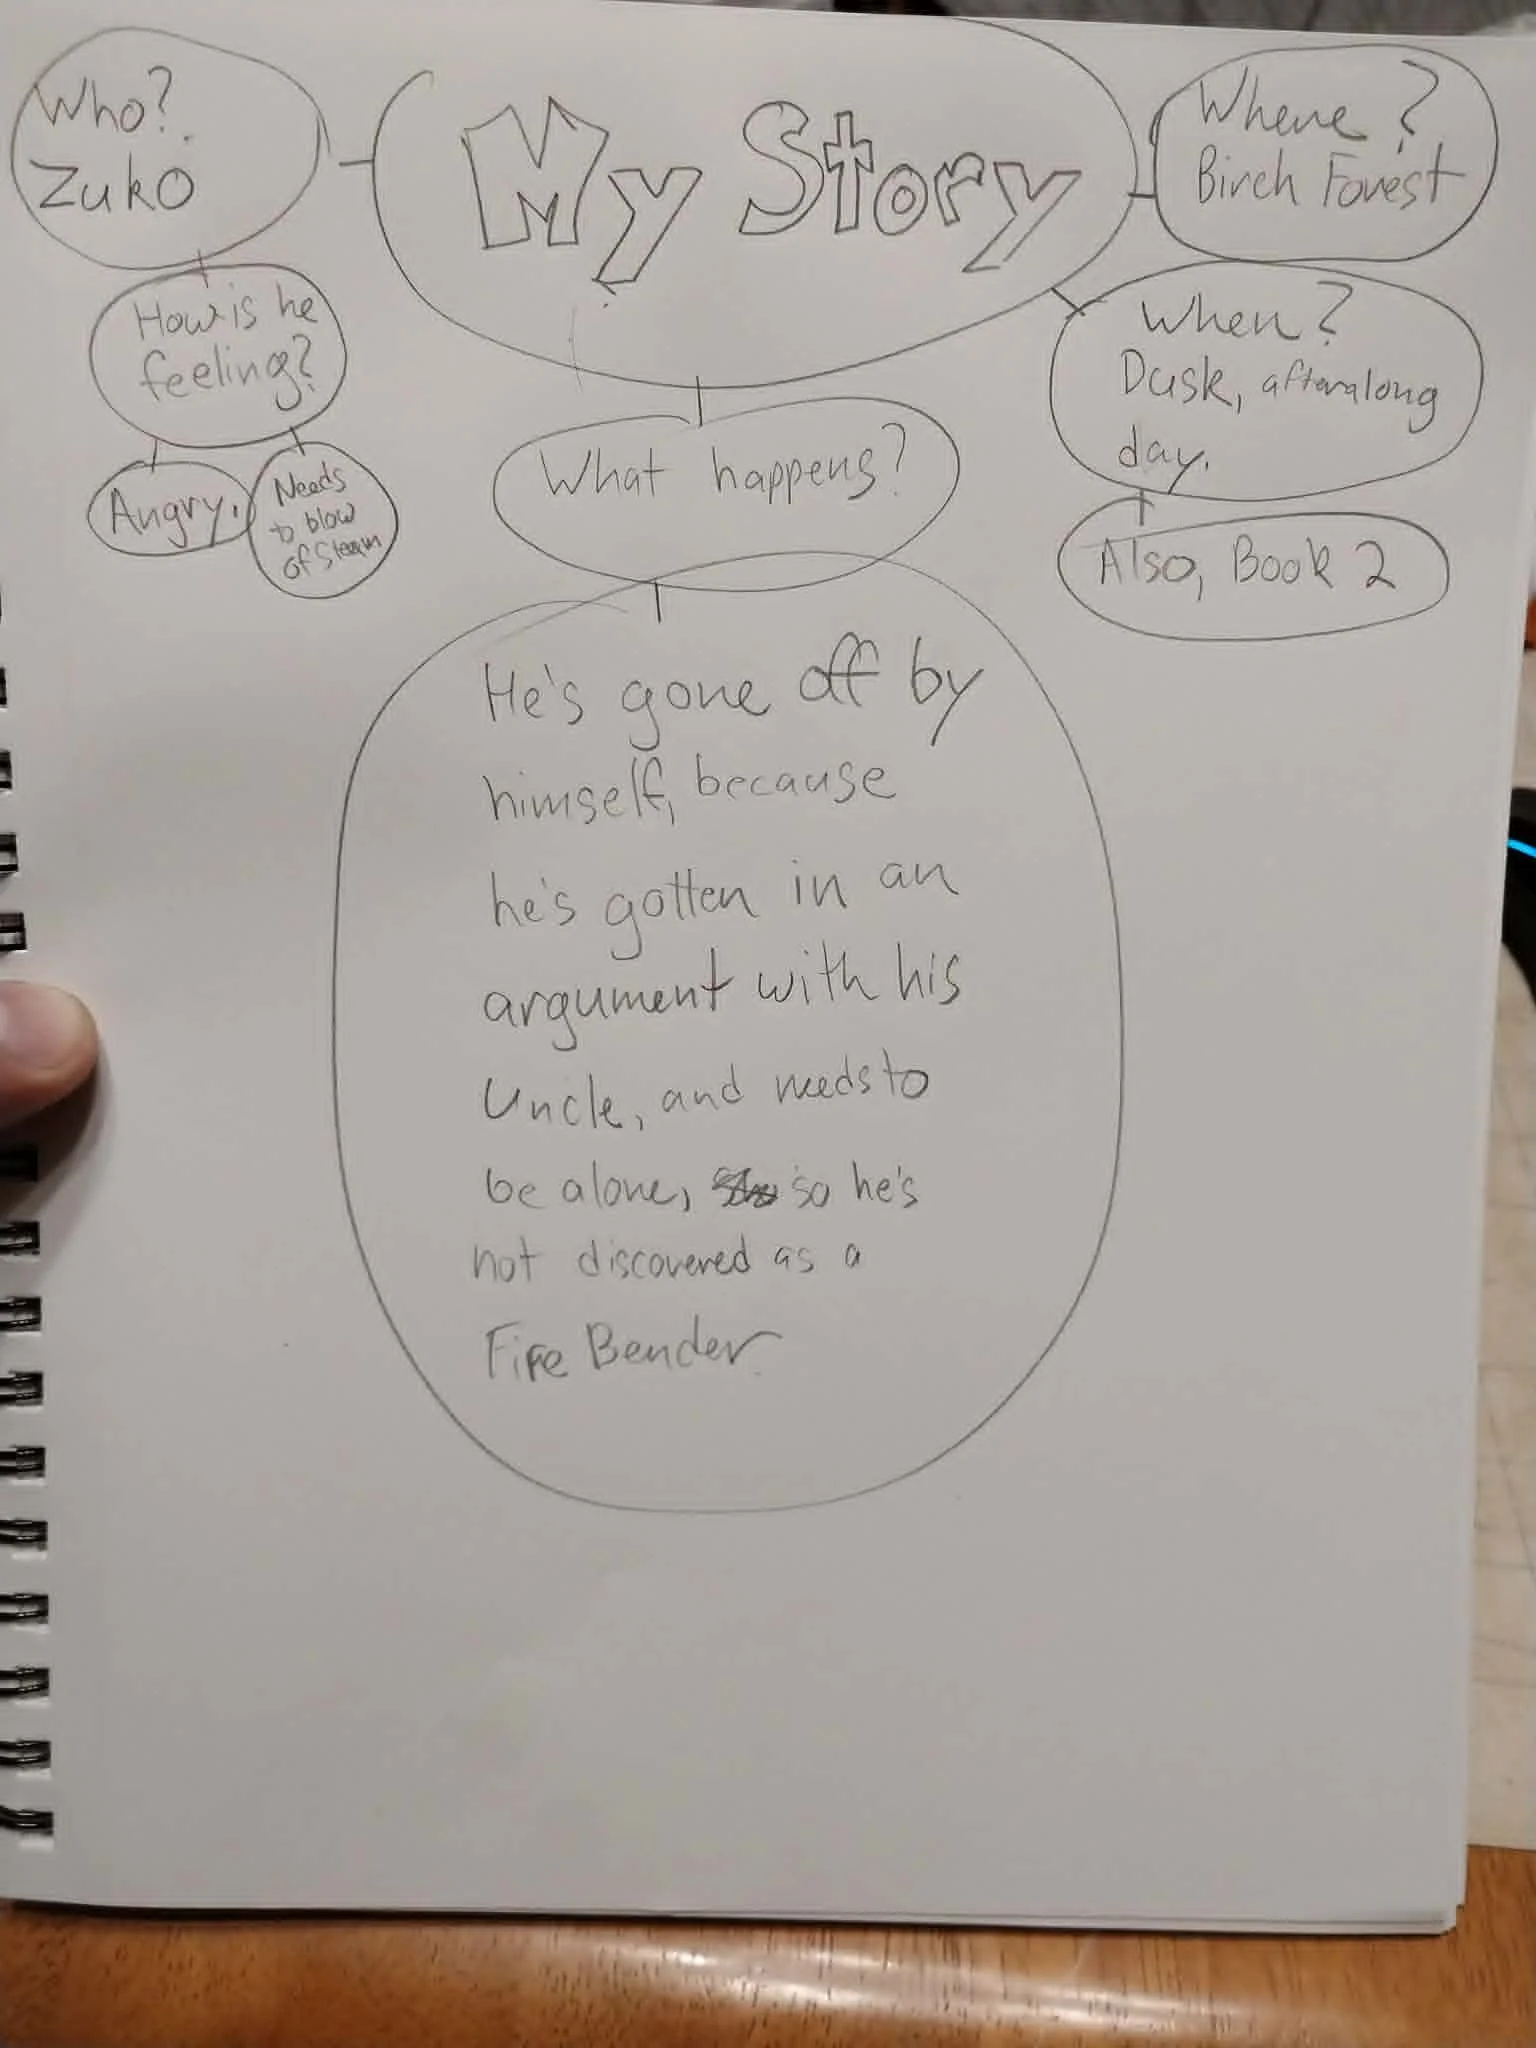
I will demonstrate brainstorming for the stories, talk about the characters, setting, time of day, feelings, and narrative.
When we’ve finished the brainstorms, and possibly some sketches, I will also have the kids bring their chromebooks to engage in independent studies using How to Draws of the character or characters they want to use, and draw said characters on a separate piece of paper. I will explain that these can be characters from any pop culture franchise they want (Labubu, Avatar: The Last Airbender, Pokémon, Boondocks, etc.), as long as they’re not doing something inappropriate for school.
The evidence of the students’ understanding, will be paper with their brainstorms on them, (This will help organize what they have to research), Their actual research will be done in class, and they’ll show their understanding when they’ve drawn their character(s), The evidence of understanding, will be that they’ve cut out their characters and glued them onto their paintings. And the overall image is clearly connected to their planning.
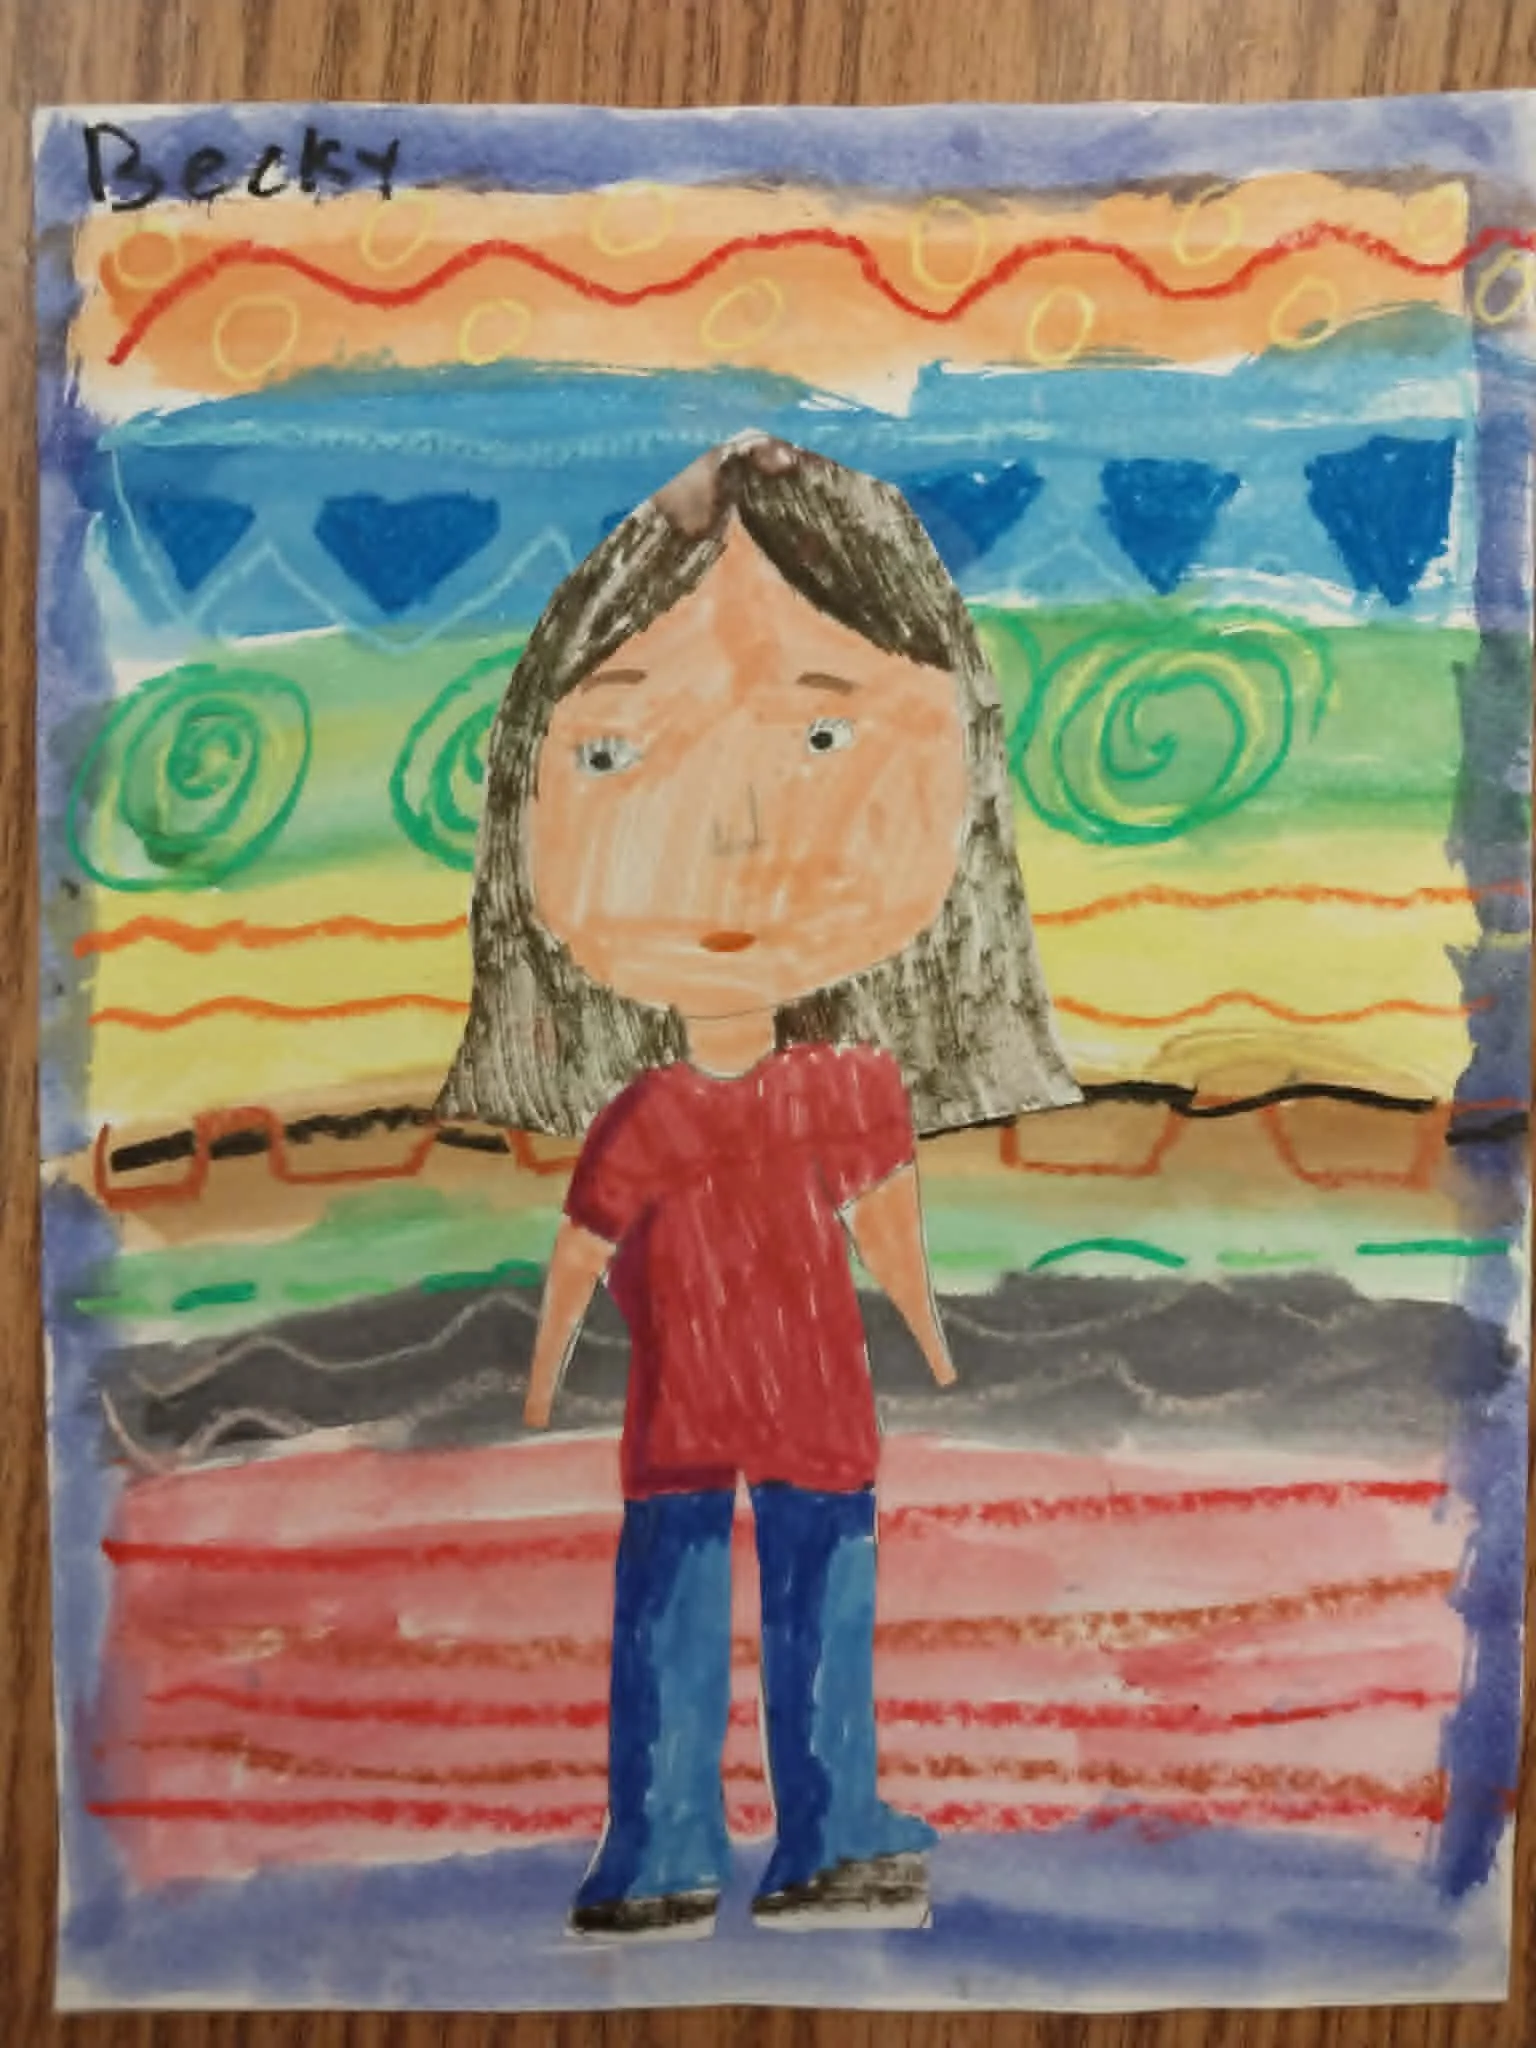
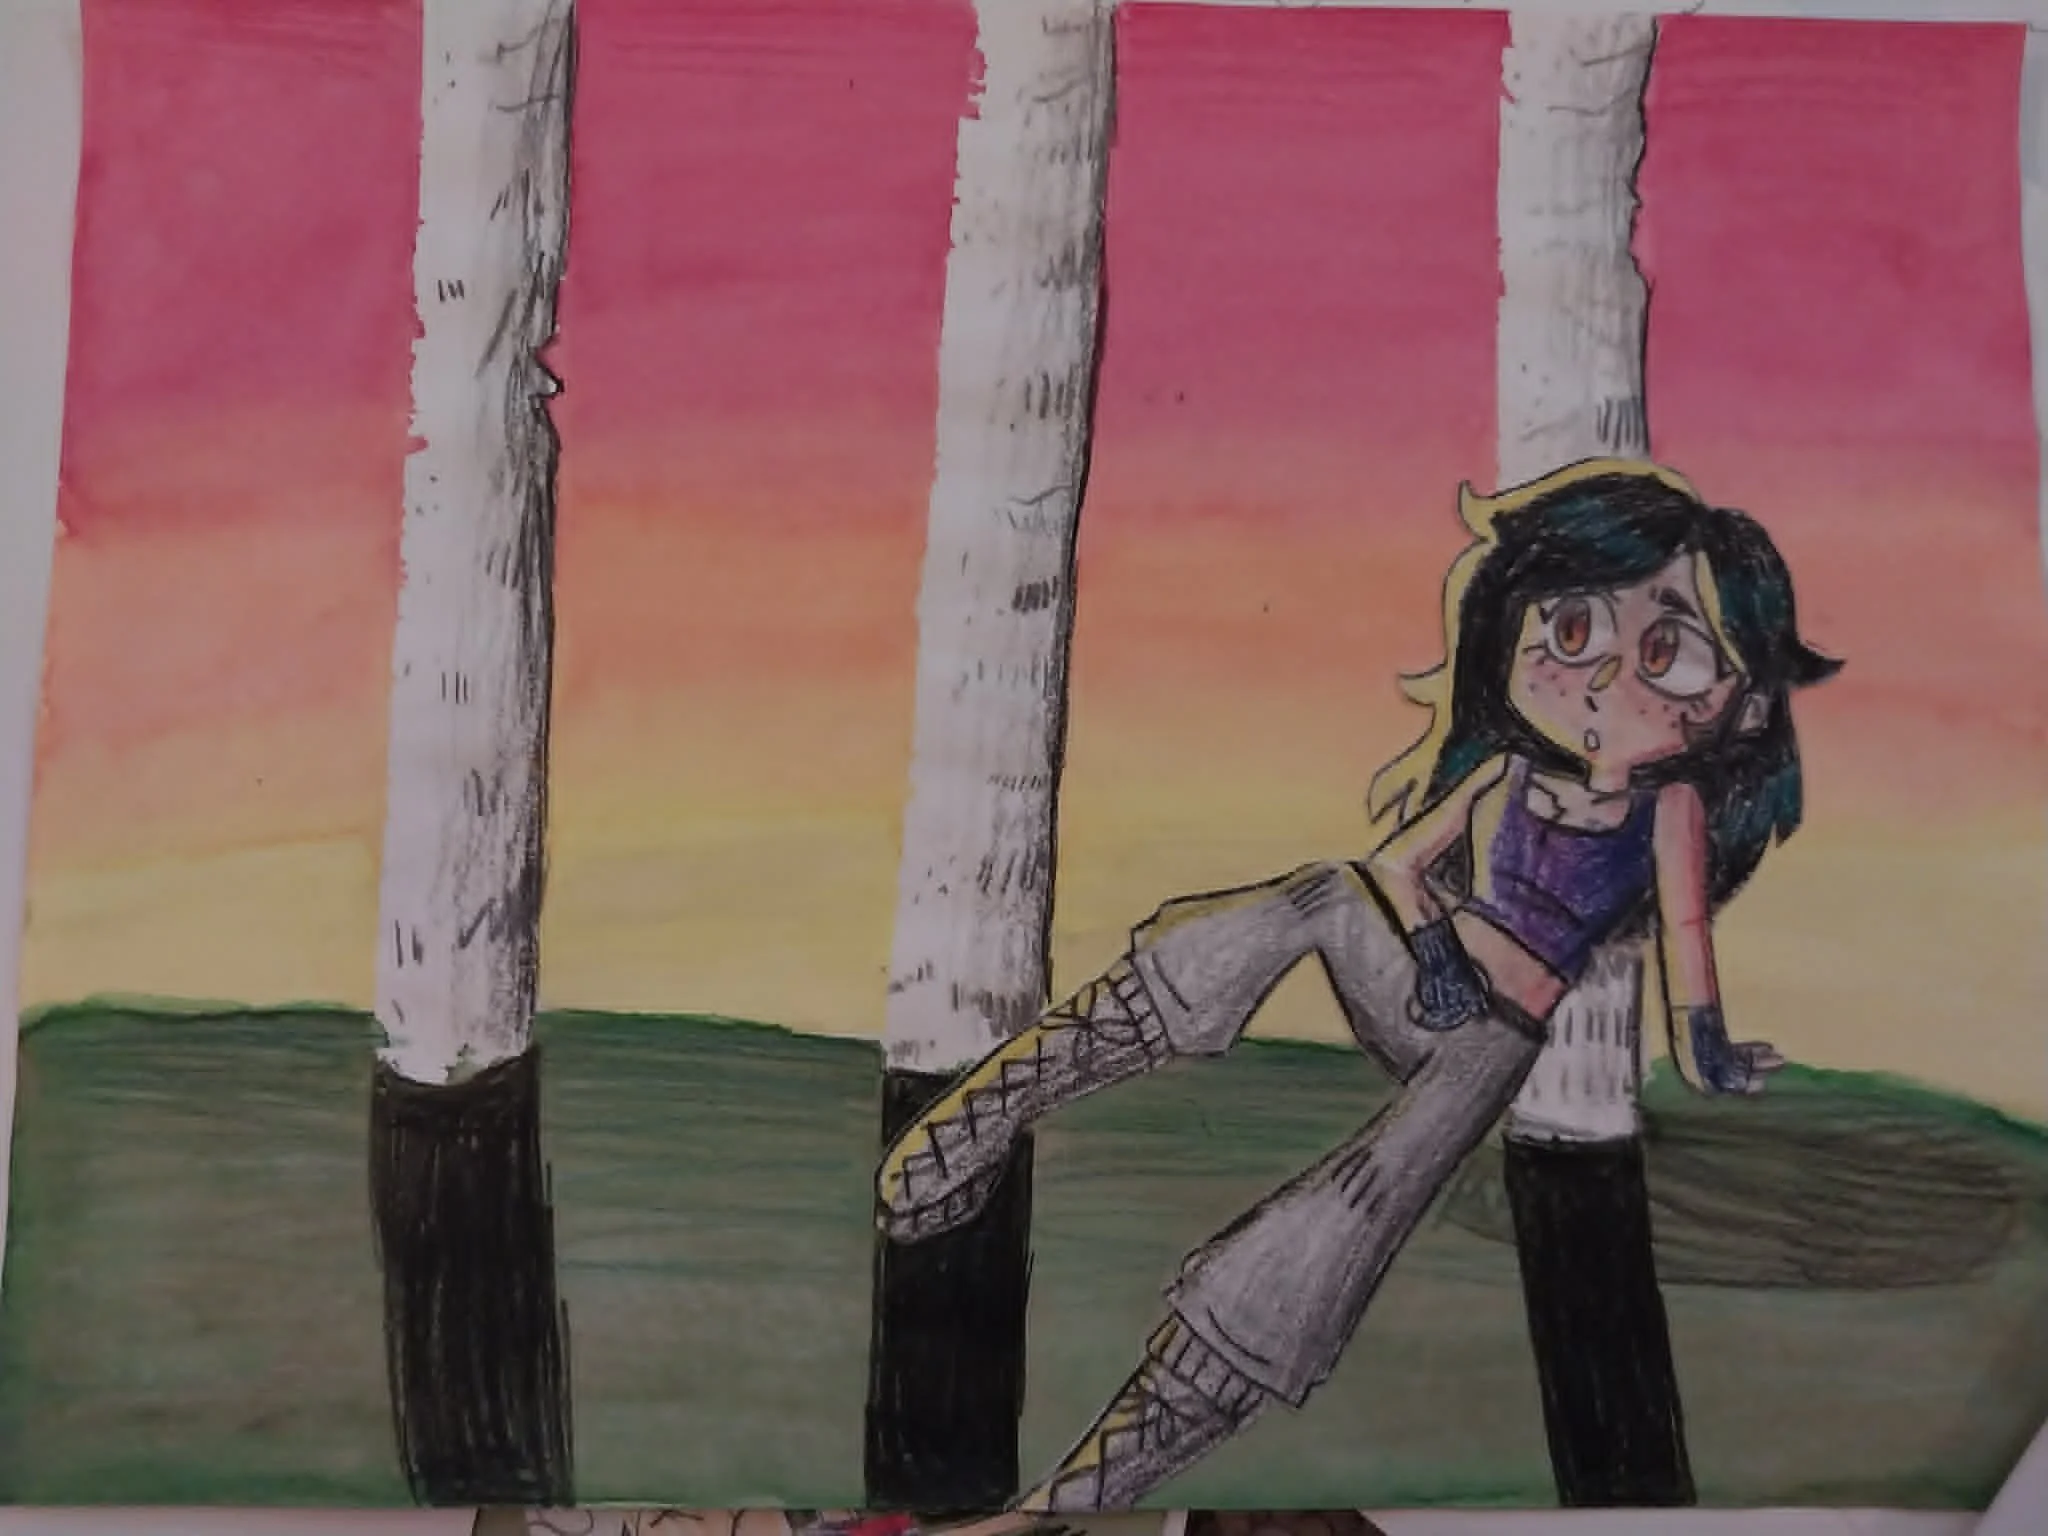
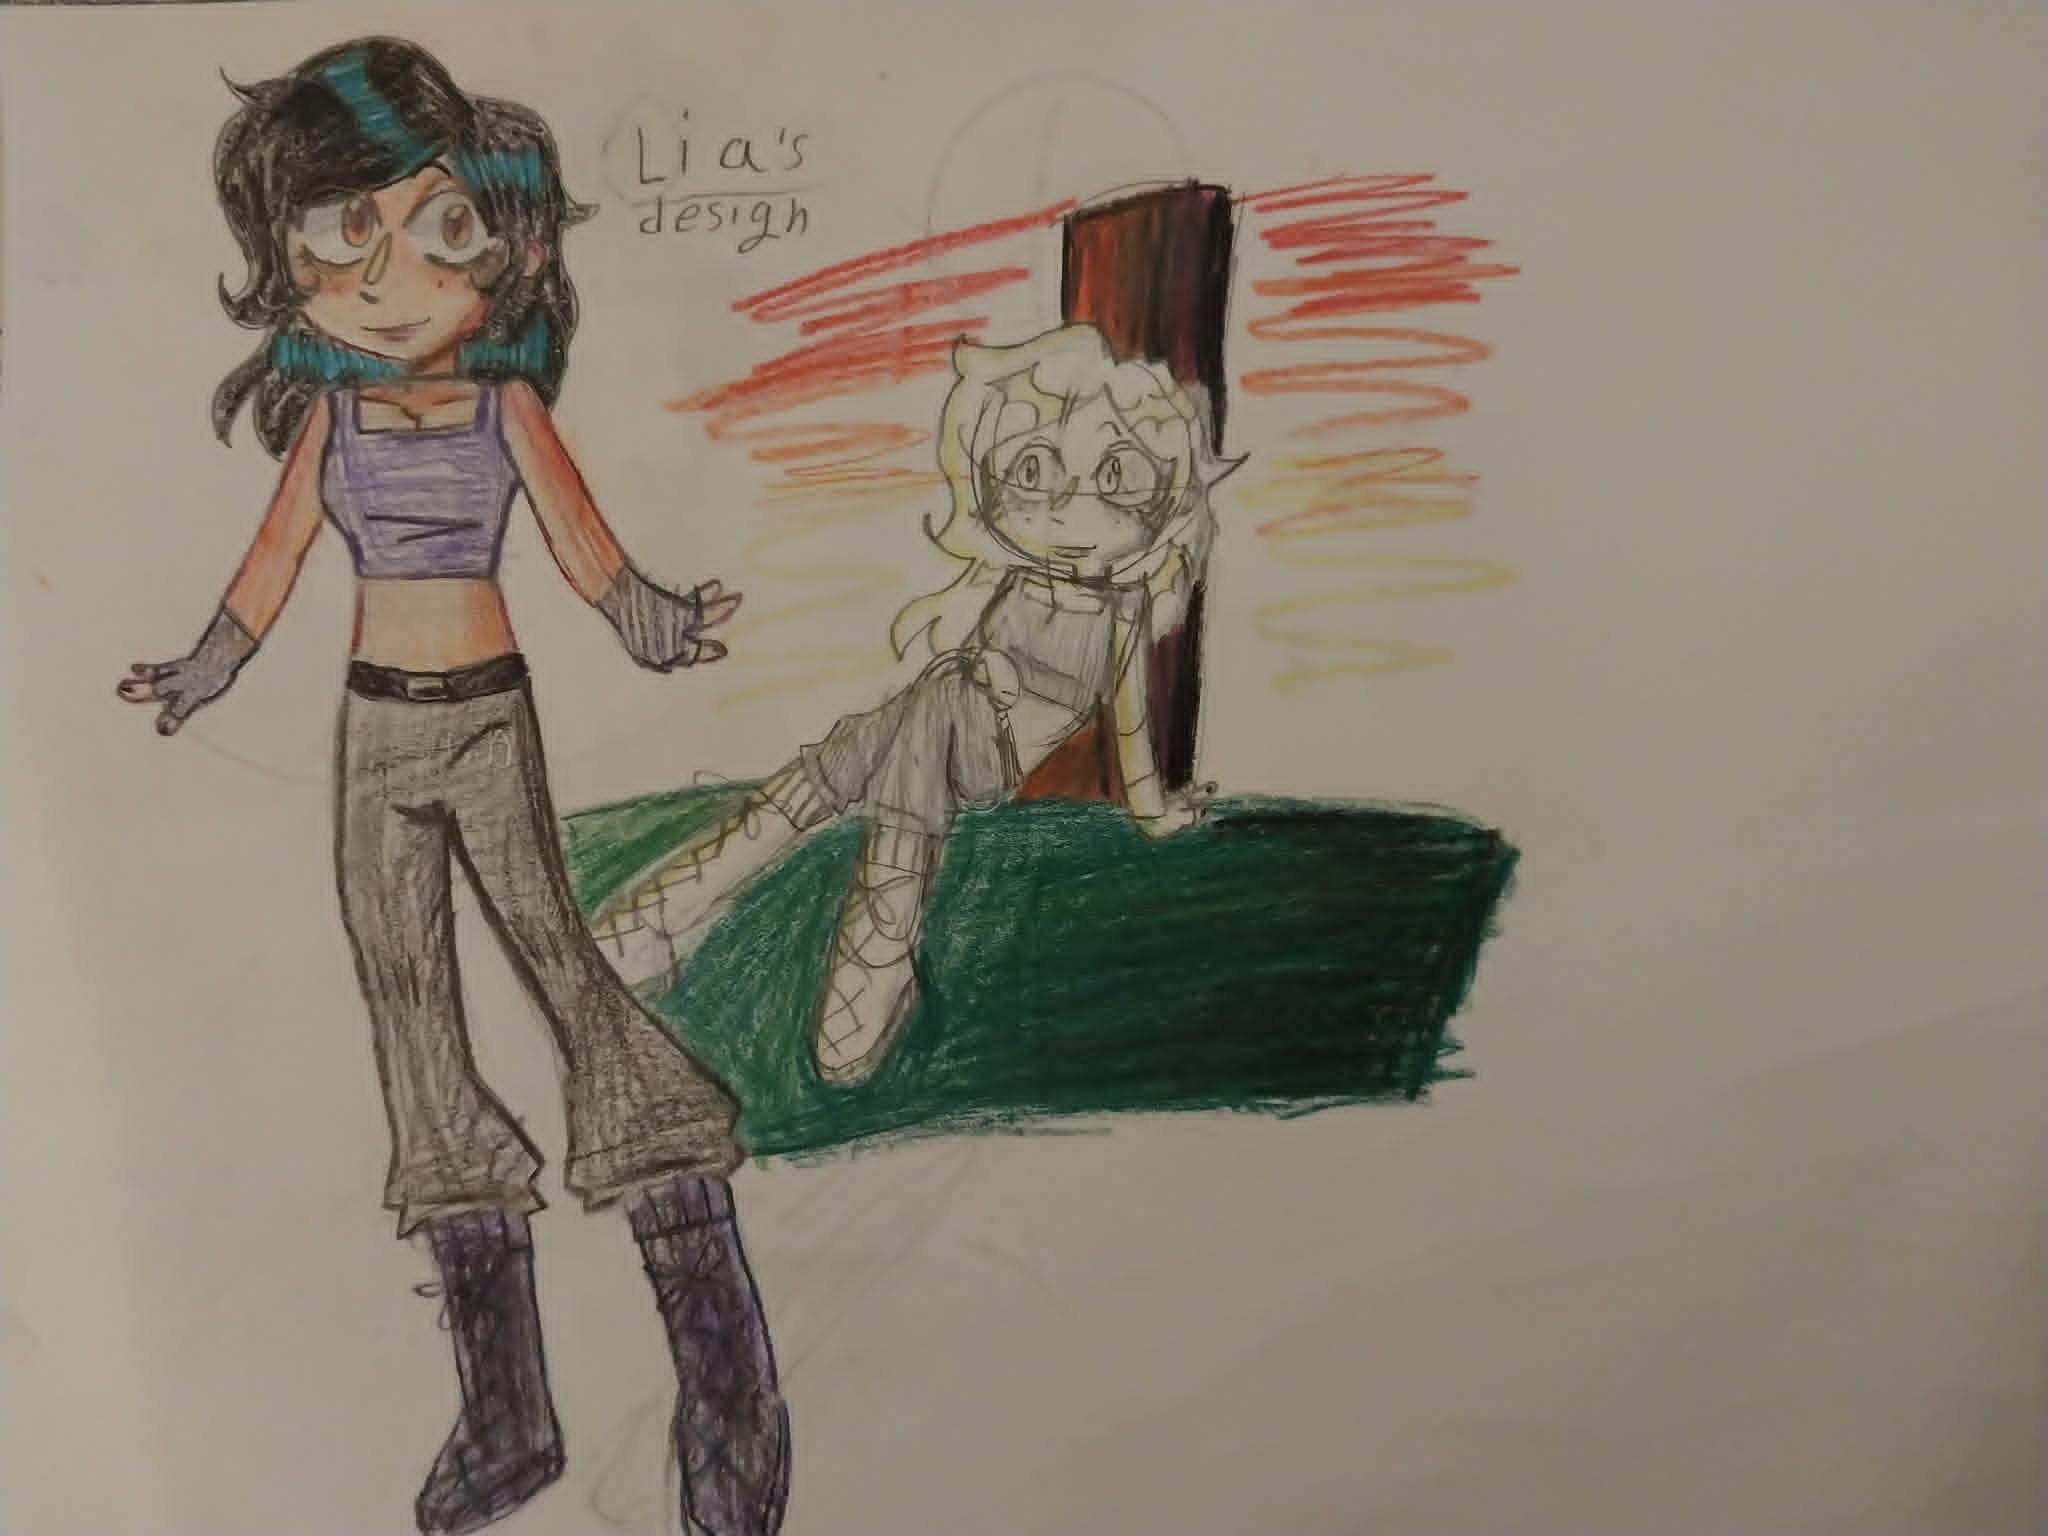
Teacher Example:
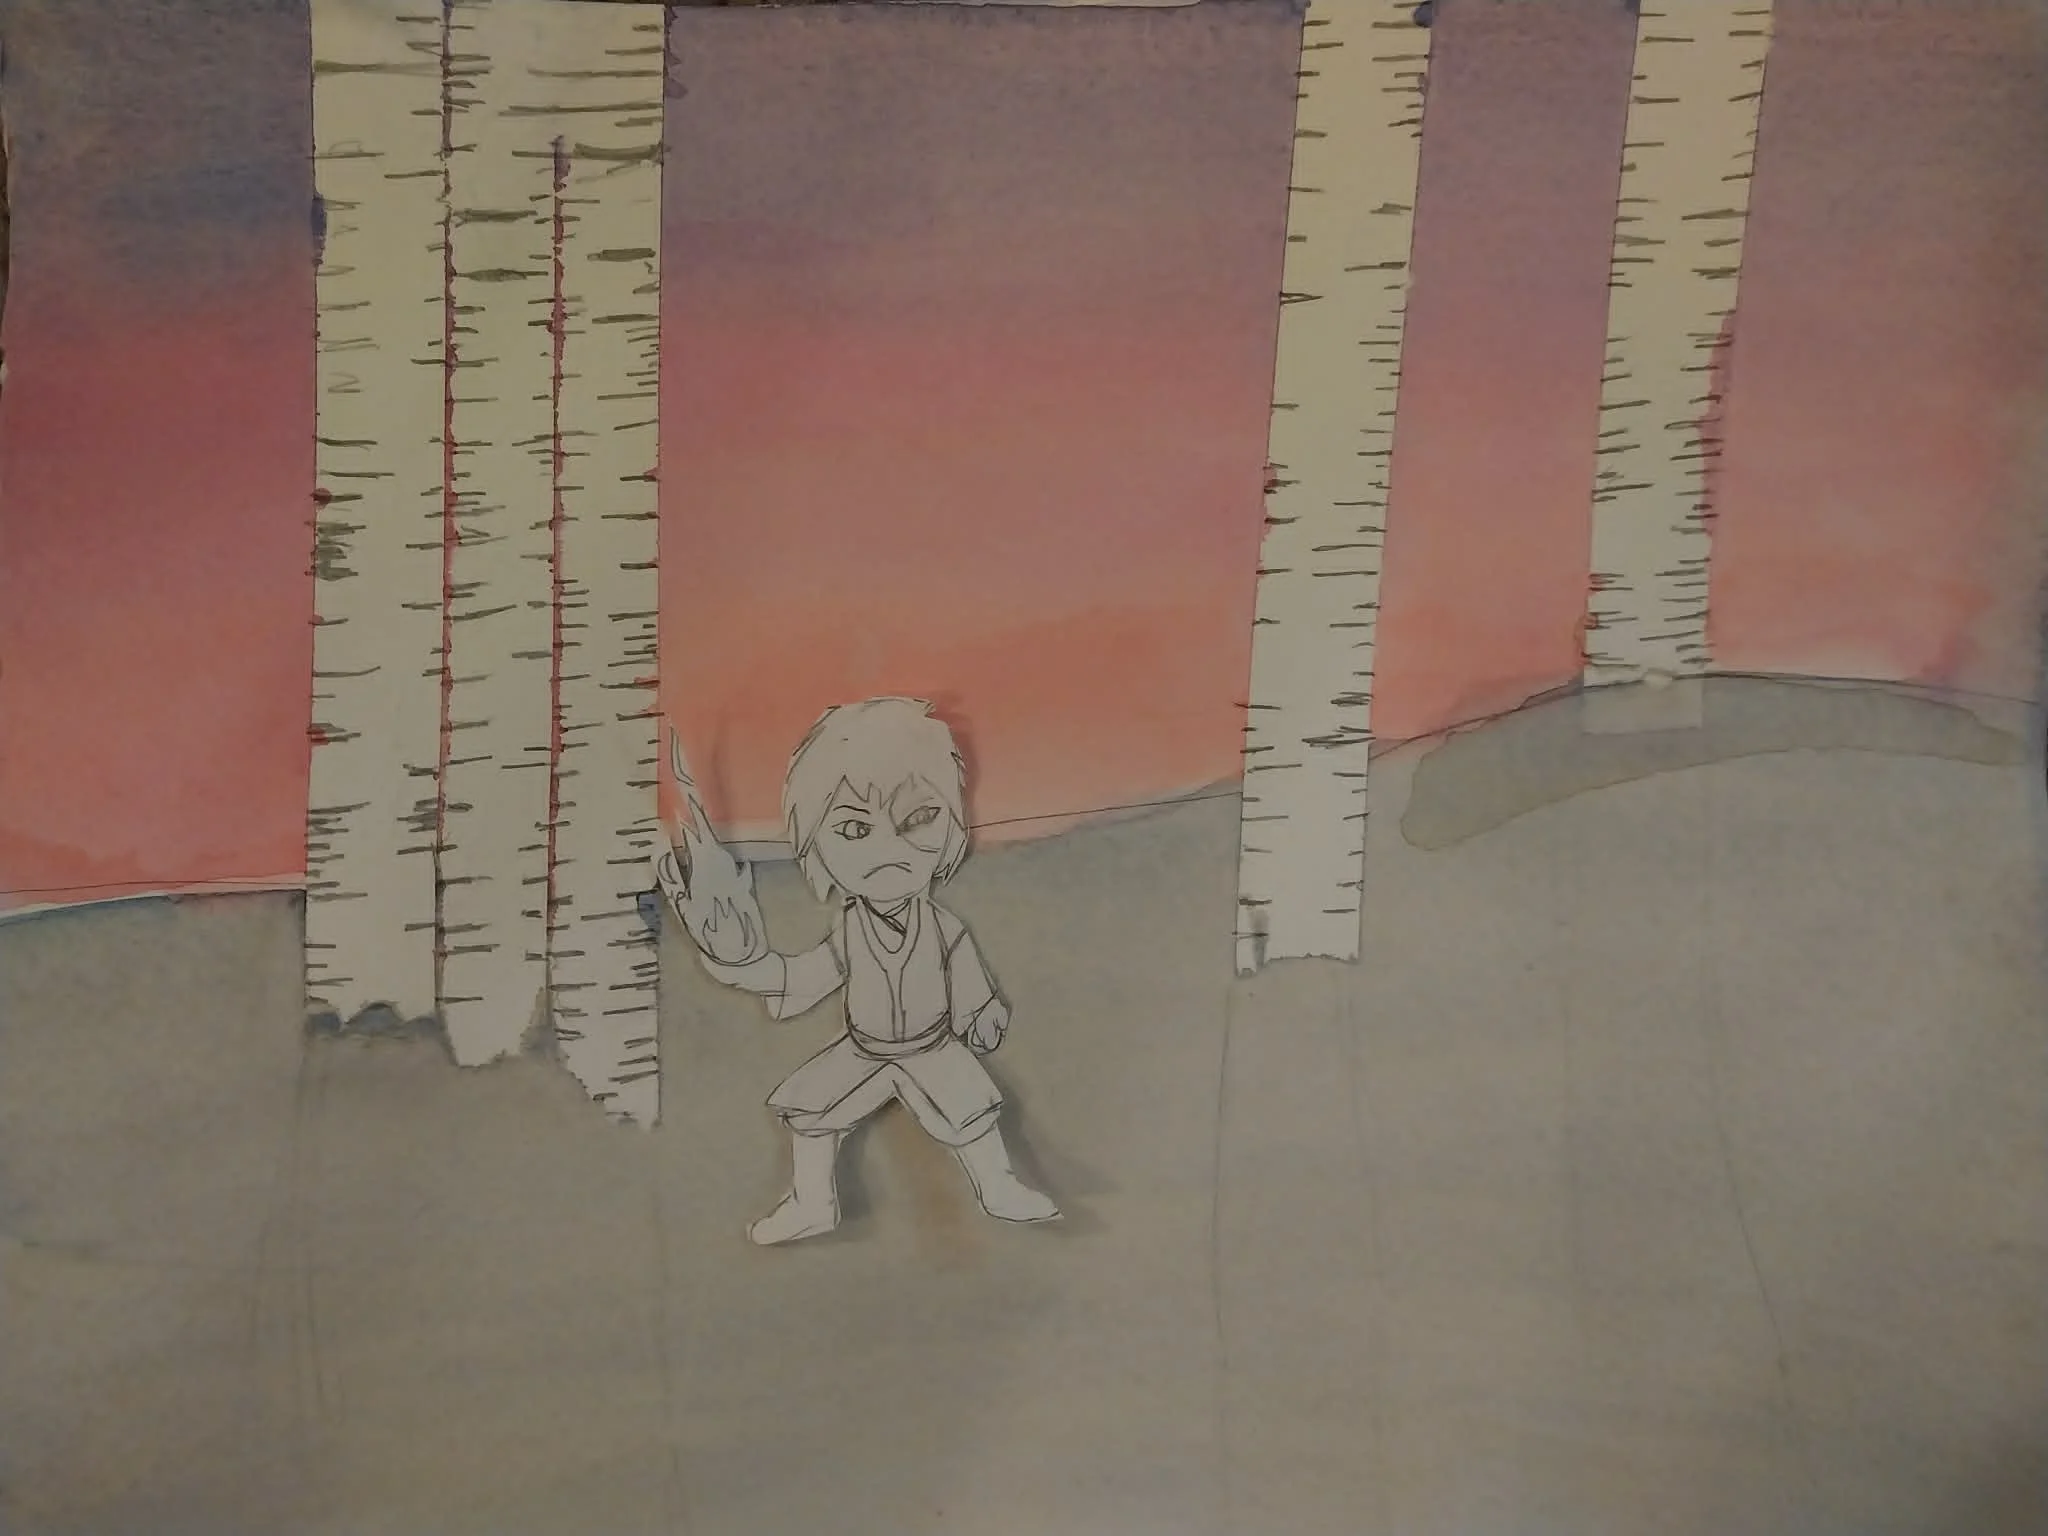
Slides:


Teacher Example:

Teacher Example:

Student Example:
Unit Plan 1 - The Feelings of Emotions.
Lesson 1
Calm Landscapes
I took the lesson from from the November 24, Edition of School Arts Magazine
https://lsc-pagepro.mydigitalpublication.com/publication/?m=60985&i=832558&p=38&ver=html5
This lesson’s Big Idea is: Finding Your Calm
It is about teaching kids’ emotional management skills, and methods to help calm down when experiencing big emotions. This will be accomplish through a combination of a book, guided meditation, and creating a landscape they imagined that brings them calm. I made a few addition because, originally, the artists the lesson includes were not very diverse, so I also used Se Jong Cho, a current, Asian-American landscape artist with a doctorate in Environmental Sciences to inspire the artwork the kids would produce.
I created a video for the collage skills, and an Anchor Chart, as well as a guided meditation to help my students think of a calm space to create, and Power Point Presentation for the more Academic learners in my K5 and 1st grade classes.
Learning Intention: Today I am learning…
How to Texture Tissue Paper with paint and/or oil pastels
How to cut out shapes
How to glue Tissue paper on construction paper
How to collage
Success Criteria: I am successful when I have created a piece that:
Has textured tissue paper with paint and/or oil pastels
Has several cut out shapes glued to my multimedia paper
Has been made from collage that relays a sense of calm
Video
Adaptations
Some of the adaptations I would make would include:
My first adaptation would be dark paper for students who might getting sensory overload from the white of the cardstock. I would instead use colored construction paper. I’m familiar with how my eyes hurt when I drive after a snowfall during the day. As someone with ADHD and ASD, I can relate to sensory issues, and think this would be a cool project to use it on because of the aesthetic, as well.
Another adaptation for children with current use of only one arm, would be to use tape to fasten the paper to the table so that they only need to use one hand to cut, and put glue on the shapes they cut out. This relieves the pressure and frustration of trying to cut with only one hand.
The third adaptation I would include would be loop scissors. This is a project for lower grades, and even with that aside, some students still have issues with the fine motor skills needed to use scissors efficiently. This could be offset with the addition of loop scissors, or really, other kinds of scissors as well.
Guided Meditation Worksheet
Close your eyes…
Think about a place where you feel calm.
What about it makes you feel calm?
What colors do you see?
What shapes do you see?
What kind of space is it?
Anchor Chart

Power Point Presentation
Videos I’d show at the beginning of the Power Point for Slides 2 and 3, respectively.
https://www.youtube.com/watch?v=1Crqcgy92aA
https://www.youtube.com/watch?v=zqqtq1UaTiE


Unit – Feelings of Emotions
Big Idea
Knowing Your Emotions
Big Idea Questions
Where is my calm place? /Where do I feel safe?
What are the feelings I want to show in this art?
How do my feelings work together?
Targeted Grade
1st-2nd
Important Developmental Markers
Ability to use scissors.
Manual Dexterity.
Using sensory input with the texture.
Pattern Recognition
Building spacial awareness.
Lesson 1
Question Explored from Big Idea
Where is my calm place? /Where do I feel safe?
Artist Names & Images
Eric Carle- Calm with the Very Hungry Caterpillar
Daisy Dodd-Noble Spruce with Grey Mountains, Purple Moonlight,
Se Jong Cho – Window, Flowerpot Parasol
Lesson Synopsis
Taken from the November 2024 issue of School Arts Magazine
Teaching kids’ emotional management skills, and methods to help calm down when experiencing big emotions. We will accomplish this through a combination of a book, guided meditation, and creating a landscape they imagined that brings them calm.


Length of Unit
1-2 months
# of Lessons
3
Artist Names & Images
Eric Carle - Calm with the Very Hungry Caterpillar
Daisy Dodd-Noble
Se Jong Cho
Kulsum Tasnif – God is Beautiful, and He Loves Beauty (Disjointed Letters) 2015
El Anatsui – Crumbling Wall 2000
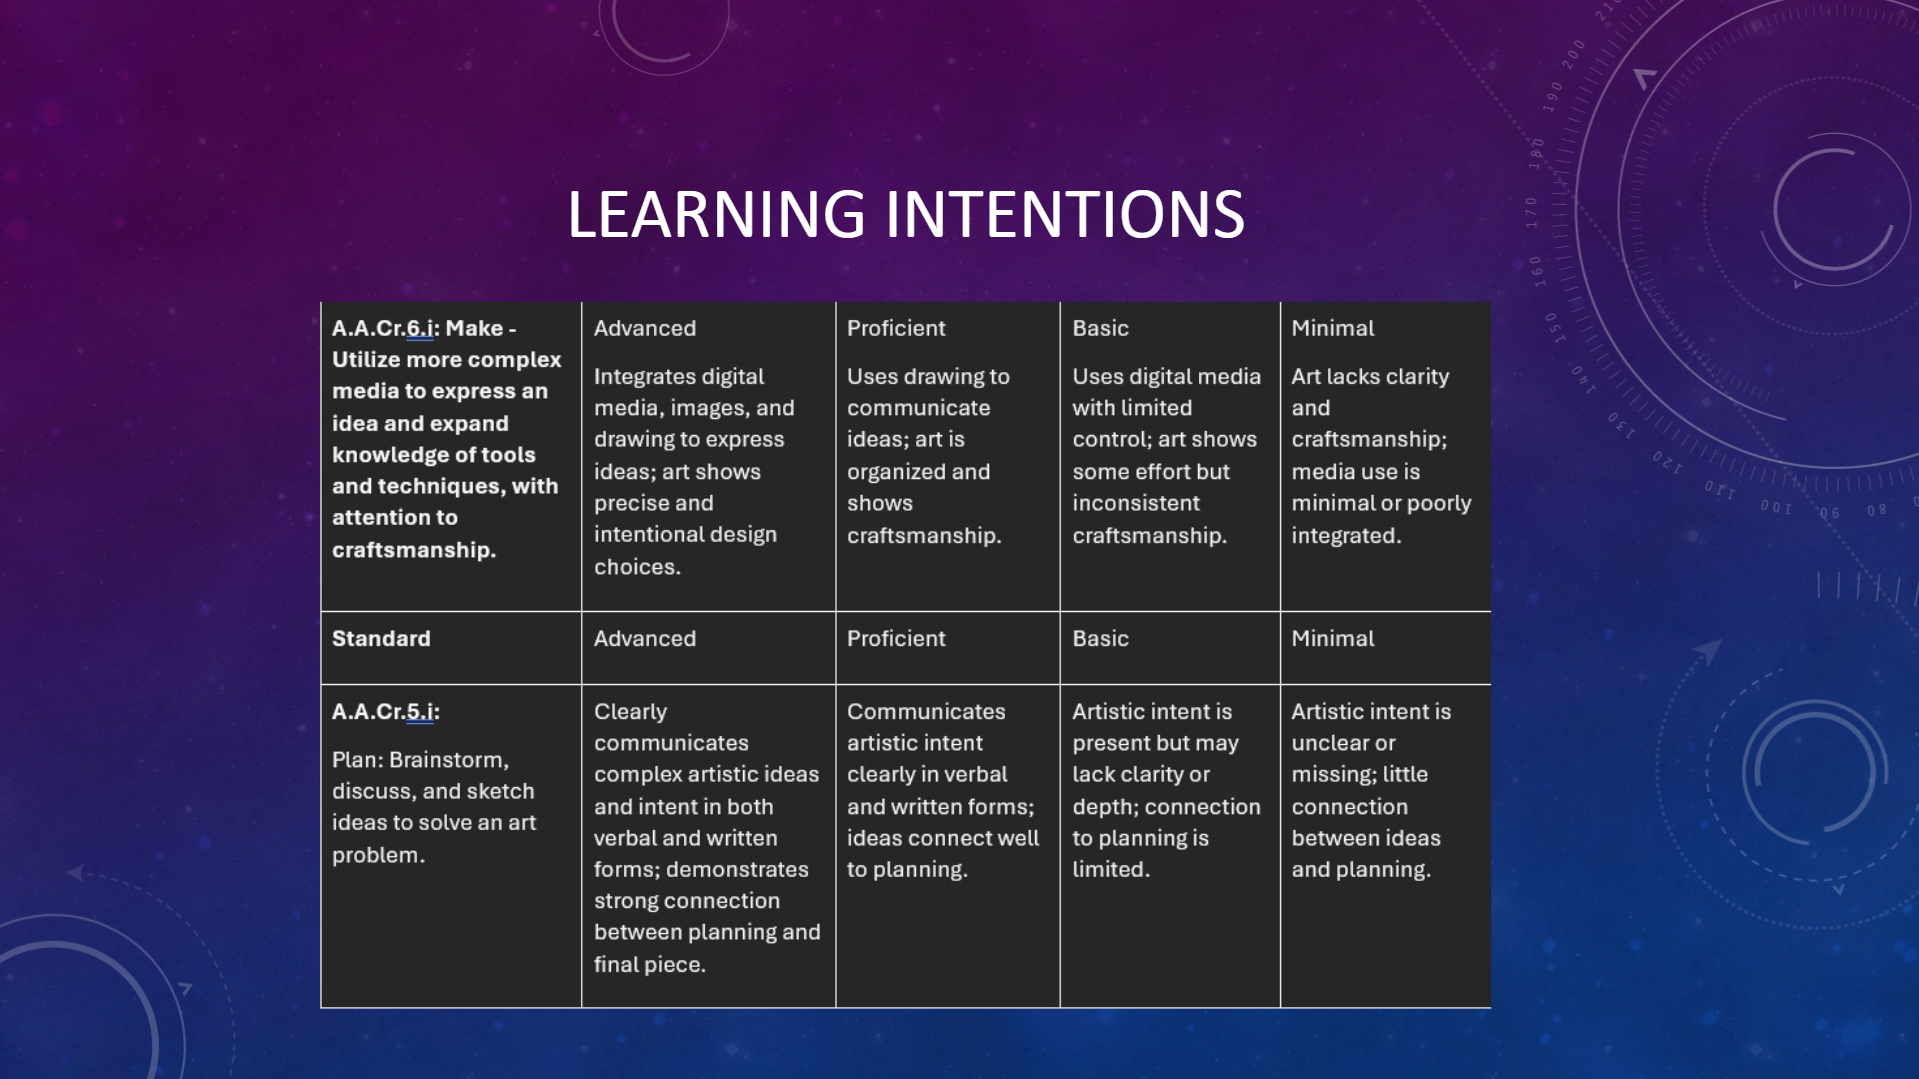
Standards
I am successful when I have created a piece that:
Has textured tissue paper with paint and/or oil pastels
Has several cut out shapes glued to my multimedia paper
Has been made from collage that relays a sense of calm
# of Classes
3-6
Take-Aways
Methods for calming themselves when experiencing big emotions.
Some degree of emotional intelligence.
How to collage.
How to texture paper with oil pastels.
Lesson 2
Question Explored from Big Idea
What are the feelings I want to show in this art?
Artist Names & Images
Kulsum Tasnif - God is Beautiful, and He loves Beautiful Things (Disjointed Words)
Lesson Synopsis
Taken From Art of Ed website.
Show a power point on Kulsum Tasnif’s piece to show how she uses patterns and textures through her art. Do a See/Think/Wonder with it and demonstrate adding texture with tempera paint using primary colors and accentuating where the mix to show what happens. Explain the difference between geometric and organic shapes, encouraging them to make patterns. Then we would proceed to make textured paper for a day and whatever time is left on the day of the demo. I’d have them do at least two sheets, more if they get done early. And tell them ahead of time to plan to cut the papers.
Standards
I am successful when I have created a piece that:
Made at least two sheets of painted paper .
Each paper has more than one color.
Each paper has an interesting design, patter, or texture
# of Classes
2-3
Take-Aways
The difference between geometric and organic shapes.
How the primary colors work together.
Art does not need to be representative.
Lesson 3
Question Explored from Big Idea
How do my feelings work together?
Artist Names & Images
El Anatsui – crumbling Wall
Lesson Synopsis
Taken from the Art of Education website.
Day 1 will have a See/Think/Wonder with El Anatsui’s Crumbling Wall, explaining how the work looks like its parts were weaved together. Demo for the day, how to make a weave using a ruler. Marking even parts, folding the paper, and cutting.
Day 2 the students will take the two sheets they painted, cut one of them the long way, the other the short way. Again, using a ruler. After a demo.
Day 3 there will be a demo on weaving the strips cut from the papers of the previous lesson.
Day 4 would be finishing/catchup day.
Standards
I am successful when I have created a piece that:
That weaves together interesting designs, patterns, and textures.
Uses both long and short sheets of painted paper.
Displays a weave using an “over, under, over, under“ technique.
# of Classes
3-4
Take-Aways
How to make a loom/warp paper.
How to use a ruler.
How to weave strips of paper.